
Sealing Your Leaky Roof Hatch to Save Money on Energy in Near Northeast
Living in Near Northeast means dealing with humid summers and freezing winters that push your HVAC system to the limit. One of the biggest hidden energy drains in your home might be right above your head: the roof hatch. These access points often lack proper insulation, creating a thermal bridge that lets conditioned air escape year-round. In fact, a poorly sealed roof hatch can account for up to 15% of your total heat loss in winter and add unnecessary cooling load in summer. The good news is that sealing and insulating your roof hatch is a straightforward upgrade that pays for itself within two years through lower energy bills. How to Get Your Roof Ready for a DC Winter in Chevy Chase.
Near Northeast rowhouses and flat-roofed buildings are especially vulnerable because their roof hatches are typically metal-framed and directly exposed to the elements. Without proper sealing, they become a weak point in your building envelope. By upgrading the insulation and weatherstripping, you can reduce drafts, prevent condensation, and improve overall comfort. This guide covers the materials, methods, and local building code requirements to help you make the right choice for your property. Why Your Capitol Hill Rowhouse Needs a Specialized Flat Roof System.
Why Your Roof Hatch is a ‘Thermal Bridge’ and How it Costs You Money
A thermal bridge is any part of your building envelope that conducts heat more readily than the surrounding materials. Metal roof hatches are classic thermal bridges because metal transfers heat quickly. In winter, cold air from the attic or roof cavity seeps through the hatch frame, chilling the room below. In summer, hot roof surfaces radiate heat through the hatch into your living space. This constant heat exchange forces your HVAC system to work harder, increasing energy consumption and wear on equipment. Metal Roof vs Asphalt Shingles Cost.
In Near Northeast, where summer humidity often exceeds 70%, an unsealed hatch also allows moist air to infiltrate. This can lead to condensation forming on the hatch frame or surrounding ceiling materials, potentially causing mold growth or water stains. Over time, the repeated freeze-thaw cycles common in DC winters can cause metal components to expand and contract, loosening seals and creating new gaps. The result is a compounding energy loss that quietly drains your wallet.
Key Types of Insulation for Roof Hatches (R-Value Comparison)
Choosing the right insulation depends on your hatch type and local climate. Here’s a comparison of common options:
| Material | R-Value per Inch | Best Use | Cost per Sq Ft |
|---|---|---|---|
| Polyisocyanurate (PIR) | 6.5 | Flat roof hatches, high moisture resistance | $2.50 |
| Expanded Polystyrene (EPS) | 4.0 | Budget-friendly, lightweight | $1.80 |
| Closed-cell Spray Foam | 6.0 | Irregular shapes, air sealing | $3.00 |
| Fiberglass Batt | 3.0 | Standard attics, not for hatches | $1.00 |
For Near Northeast, polyisocyanurate board is often the best choice because it offers high R-value in a thin profile and resists moisture better than EPS. Closed-cell spray foam can fill gaps around the hatch frame but is more expensive. Fiberglass is not recommended for hatches because it can sag and lose effectiveness when exposed to moisture.
Washington DC Building Codes and Energy Requirements
The Washington DC Energy Conservation Code (based on the 2018 International Energy Conservation Code) requires commercial and multifamily buildings to meet specific R-value standards for roof assemblies. For roof hatches, while there’s no separate mandate, the code implies that any penetration of the thermal envelope must be sealed to prevent air leakage. DC Municipal Regulations (DMR) Chapter 11-4-1410 specifies that roof access points must be weatherproofed to prevent water intrusion. Washington DC Energy Conservation Code.
If your building is in a historic district like Near Northeast, the DC Historic Preservation Office may have additional guidelines about maintaining the exterior appearance of roof hatches. However, insulation upgrades are generally allowed as long as they don’t alter visible features. Always check with the DC Department of Buildings before starting work to ensure compliance with both energy and preservation codes. Navigating Historic Preservation Roofing Rules in Dupont Circle.
Step-by-Step Professional Insulation Process
- Assess Current Condition
Inspect the hatch for gaps, rust, or damaged weatherstripping. Use a smoke pencil or infrared thermometer to detect air leaks around the frame.
- Remove Old Gaskets
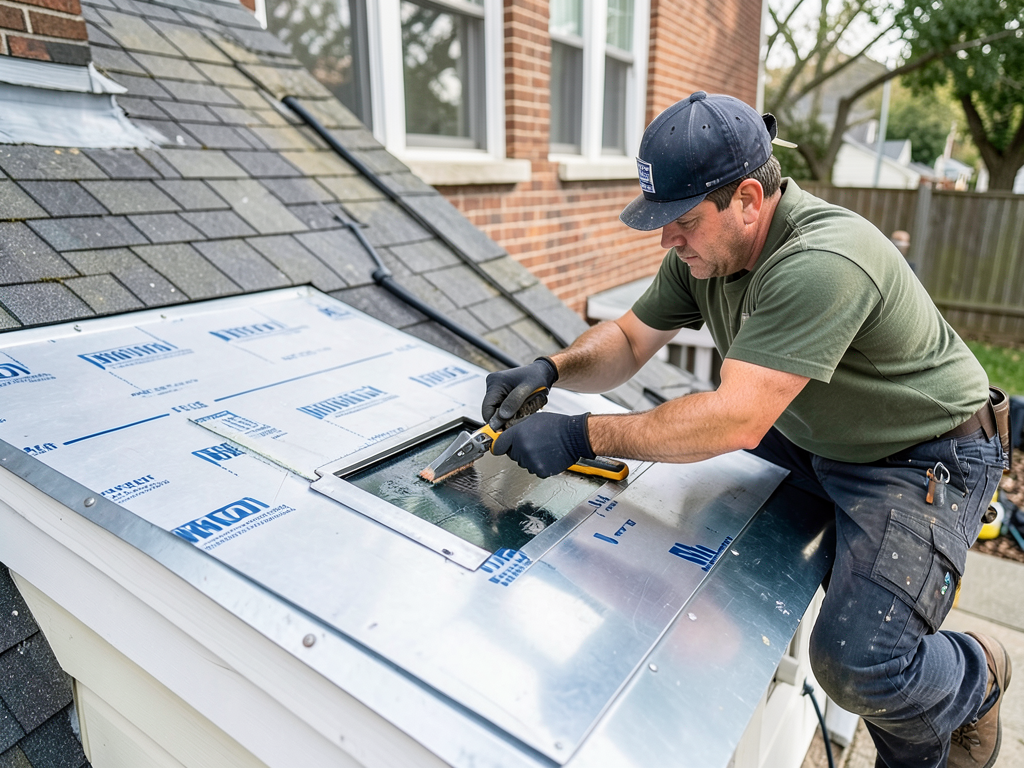
Pry off deteriorated rubber or foam gaskets. Clean the mating surfaces with a wire brush to ensure a tight seal for new materials.
- Install Rigid Insulation Board
Cut polyisocyanurate board to fit the hatch lid. Use construction adhesive to bond it to the metal surface, covering all exposed areas.
- Apply Vapor Barrier
Lay a polyethylene sheet over the insulation to prevent moisture from reaching the metal frame, especially important in DC’s humid climate.
- Install New Weatherstripping
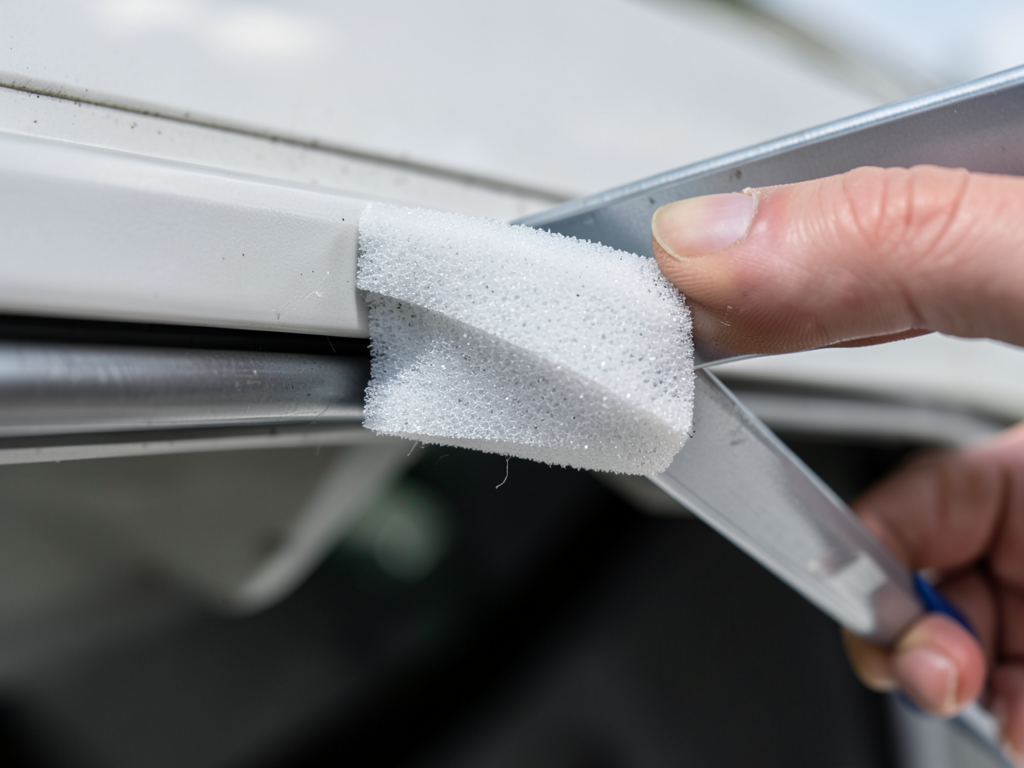
Apply high-density foam tape or bulb-style weatherstripping to the hatch frame. Ensure it compresses fully when closed for an airtight seal.
- Test and Adjust
Close the hatch and check for gaps using a flashlight or smoke test. Adjust weatherstripping until no light or air passes through.
Signs Your Existing Hatch Insulation Has Failed
Many Near Northeast homeowners don’t realize their roof hatch is causing problems until they notice these warning signs:
- Drafty Ceiling – You can feel cold air or heat radiating from the hatch area even when it’s closed.
- Condensation Rings – Water stains or mold spots appear on the ceiling around the hatch frame.
- Higher Energy Bills – Unexplained spikes in heating or cooling costs during extreme weather.
- Difficulty Opening/Closing – Warped or rusted frames make the hatch hard to operate, indicating moisture damage.
- Ice Dam Formation – In winter, ice builds up around the hatch, showing heat loss to the roof surface.
If you notice any of these issues, it’s time to inspect and upgrade your hatch insulation before the problem worsens.
ROI: How Much Can You Save on DC Energy Bills?
The return on investment for sealing a roof hatch depends on your home’s size and HVAC usage. In Near Northeast, where heating and cooling seasons are both significant, homeowners typically see these savings:
| Upgrade Type | Estimated Cost | Annual Energy Savings | Payback Period |
|---|---|---|---|
| DIY Weatherstripping Only | $50-$100 | $30-$50 | 1-2 years |
| Professional Insulation + Gaskets | $300-$500 | $100-$150 | 2-3 years |
| Full Hatch Replacement | $800-$1,500 | $150-$250 | 3-5 years |
Professional installation ensures proper air sealing and compliance with DC codes, maximizing your savings. Over a 10-year period, a well-sealed hatch can save you $1,000-$2,500 in energy costs while improving indoor comfort.
Frequently Asked Questions
Can I insulate my roof hatch myself?
Yes, simple weatherstripping upgrades are DIY-friendly. However, installing rigid insulation boards and vapor barriers requires proper tools and knowledge of DC building codes to avoid moisture issues.
How often should I replace hatch gaskets?
Check gaskets annually. In DC’s climate, they typically last 5-7 years before hardening or cracking. Replace them if you notice drafts or difficulty closing the hatch.
Will insulating my hatch affect roof access?
Properly installed insulation should not impede access. Use lightweight materials and ensure the hatch still opens and closes smoothly after upgrades.
Are there tax incentives for energy efficiency upgrades?
DC offers some rebates for energy efficiency improvements through the DC Sustainable Energy Utility. Check their website for current programs that might apply to hatch insulation.
How do I know if my hatch meets DC energy code?
A professional energy audit can assess your hatch’s performance. Look for signs like drafts, condensation, or ice dam formation as indicators of non-compliance.
Ready to Stop Wasting Energy?
Don’t let a leaky roof hatch drain your wallet. Call (771) 240-3300 today to schedule your inspection. Our Near Northeast experts will assess your hatch, recommend the right insulation solution, and ensure it meets all DC building codes. Pick up the phone and call (771) 240-3300 before the next heat wave or cold snap hits. For more information, visit Energy.gov weatherstripping guide.
You may also find this helpful. Why Narrow Alleys Make Roofing Projects Tricky for Rowhouses in the Atlas District.
You may also find this helpful. Stopping Your Skylight from Turning Your Buzzard Point Condo Into a Greenhouse.
{
“@context”: “https://schema.org”,
“@type”: “BlogPosting”,
“headline”: “Sealing Your Leaky Roof Hatch to Save Money on Energy in Near Northeast”,
“description”: “Learn how sealing your roof hatch in Near Northeast can cut energy bills by up to 15%. Expert tips on insulation, gaskets, and DC building code compliance.”,
“wordCount”: 1303,
“datePublished”: “2026-05-23T06:02:00.000Z”,
“dateModified”: “2026-05-23T06:02:00.000Z”,
“inLanguage”: “en-US”,
“mainEntityOfPage”: {
“@type”: “WebPage”,
“@id”: “https://aceroofingwashingtondc.com”
},
“publisher”: {
“@type”: “LocalBusiness”,
“name”: “Ace Roofing Washington DC”,
“url”: “https://aceroofingwashingtondc.com”
},
“author”: {
“@type”: “Organization”,
“name”: “Ace Roofing Washington DC”,
“url”: “https://aceroofingwashingtondc.com”
},
“image”: {
“@type”: “ImageObject”,
“url”: “https://aceroofingwashingtondc.com/wp-content/uploads/2026/03/sealing-your-leaky-roof-hatch-to-save-money-on-ene-1.png”
}
}
{
“@context”: “https://schema.org”,
“@type”: “RoofingContractor”,
“name”: “Ace Roofing Washington DC”,
“url”: “https://aceroofingwashingtondc.com”,
“address”: {
“@type”: “PostalAddress”,
“addressLocality”: “Washington DC”
},
“areaServed”: {
“@type”: “City”,
“name”: “Washington DC”
}
}
{
“@context”: “https://schema.org”,
“@type”: “FAQPage”,
“mainEntity”: [
{
“@type”: “Question”,
“name”: “ROI: How Much Can You Save on DC Energy Bills?”,
“acceptedAnswer”: {
“@type”: “Answer”,
“text”: “The return on investment for sealing a roof hatch depends on your home’s size and HVAC usage. In Near Northeast, where heating and cooling seasons are both significant, homeowners typically see these savings:”
}
},
{
“@type”: “Question”,
“name”: “Can I insulate my roof hatch myself?”,
“acceptedAnswer”: {
“@type”: “Answer”,
“text”: “Yes, simple weatherstripping upgrades are DIY-friendly. However, installing rigid insulation boards and vapor barriers requires proper tools and knowledge of DC building codes to avoid moisture issues.”
}
},
{
“@type”: “Question”,
“name”: “How often should I replace hatch gaskets?”,
“acceptedAnswer”: {
“@type”: “Answer”,
“text”: “Check gaskets annually. In DC’s climate, they typically last 5-7 years before hardening or cracking. Replace them if you notice drafts or difficulty closing the hatch.”
}
},
{
“@type”: “Question”,
“name”: “Will insulating my hatch affect roof access?”,
“acceptedAnswer”: {
“@type”: “Answer”,
“text”: “Properly installed insulation should not impede access. Use lightweight materials and ensure the hatch still opens and closes smoothly after upgrades.”
}
},
{
“@type”: “Question”,
“name”: “How do I know if my hatch meets DC energy code?”,
“acceptedAnswer”: {
“@type”: “Answer”,
“text”: “A professional energy audit can assess your hatch’s performance. Look for signs like drafts, condensation, or ice dam formation as indicators of non-compliance.”
}
},
{
“@type”: “Question”,
“name”: “Ready to Stop Wasting Energy?”,
“acceptedAnswer”: {
“@type”: “Answer”,
“text”: “Don’t let a leaky roof hatch drain your wallet. Call (771) 240-3300 today to schedule your inspection. Our Near Northeast experts will assess your hatch, recommend the right insulation solution, and ensure it meets all DC building codes. Pick up the phone and call (771) 240-3300 before the next heat wave or cold snap hits. For more information, visit Energy.gov weatherstripping guide.”
}
}
]
}
{
“@context”: “https://schema.org”,
“@type”: “HowTo”,
“name”: “How to Insulate a Roof Hatch”,
“step”: [
{
“@type”: “HowToStep”,
“position”: 1,
“name”: “Assess Current Condition”,
“text”: “Inspect the hatch for gaps, rust, or damaged weatherstripping. Use a smoke pencil or infrared thermometer to detect air leaks around the frame.”
},
{
“@type”: “HowToStep”,
“position”: 2,
“name”: “Remove Old Gaskets”,
“text”: “Pry off deteriorated rubber or foam gaskets. Clean the mating surfaces with a wire brush to ensure a tight seal for new materials.”
},
{
“@type”: “HowToStep”,
“position”: 3,
“name”: “Install Rigid Insulation Board”,
“text”: “Cut polyisocyanurate board to fit the hatch lid. Use construction adhesive to bond it to the metal surface, covering all exposed areas.”
},
{
“@type”: “HowToStep”,
“position”: 4,
“name”: “Apply Vapor Barrier”,
“text”: “Lay a polyethylene sheet over the insulation to prevent moisture from reaching the metal frame, especially important in DC’s humid climate.”
},
{
“@type”: “HowToStep”,
“position”: 5,
“name”: “Install New Weatherstripping”,
“text”: “Apply high-density foam tape or bulb-style weatherstripping to the hatch frame. Ensure it compresses fully when closed for an airtight seal.”
},
{
“@type”: “HowToStep”,
“position”: 6,
“name”: “Test and Adjust”,
“text”: “Close the hatch and check for gaps using a flashlight or smoke test. Adjust weatherstripping until no light or air passes through.”
}
],
“image”: “https://aceroofingwashingtondc.com/wp-content/uploads/2026/03/sealing-your-leaky-roof-hatch-to-save-money-on-ene-1.png”
}
{
“@context”: “https://schema.org”,
“@type”: “BreadcrumbList”,
“itemListElement”: [
{
“@type”: “ListItem”,
“position”: 1,
“name”: “Home”,
“item”: “https://aceroofingwashingtondc.com”
},
{
“@type”: “ListItem”,
“position”: 2,
“name”: “Blog”,
“item”: “https://aceroofingwashingtondc.com/blog”
},
{
“@type”: “ListItem”,
“position”: 3,
“name”: “Sealing Your Leaky Roof Hatch to Save Money on Energy in Near Northeast”
}
]
}
{
“@context”: “https://schema.org”,
“@type”: “Service”,
“serviceType”: “Roofing”,
“provider”: {
“@type”: “LocalBusiness”,
“name”: “Ace Roofing Washington DC”,
“url”: “https://aceroofingwashingtondc.com”
},
“areaServed”: {
“@type”: “City”,
“name”: “Washington DC”
},
“description”: “Learn how sealing your roof hatch in Near Northeast can cut energy bills by up to 15%. Expert tips on insulation, gaskets, and DC building code compliance.”
}